How to Set Up Google Analytics in Tag Manager
What is Google Tag Manager and Why Do You Need It?
Google Tag Manager is a tool & working interface developed by Google to ease the process of installing snippets of codes, or tags, on websites to better track & report actions or behaviors of visitors to your site. It uses Google Tag Manager containers to keep all your tags & triggers in a manageable workspace. To use Google Tag Manager to implement Analytics, you’ll need to have a Google Tag Manager account set up already. If you don’t, head to the Google Tag Manager sign up page.
Do I need both Google Analytics and Tag Manager?
A common question about Google Tag Manager vs Google Analytics is which one is better to use on your site? That’s sort of a trick question. While you can set up the Google Analytics code snippet outside of Google Tag Manager, ideally, these two tools work in conjunction, and benefit each other. To seamlessly use Google Tag Manager to track Goals in Google Analytics, we use both tools together.
How do I set up Google Tag Manager?
If you don’t have a Google Tag Manager account and container set up yet, sign up here. If you need some Google Tag Manager help, or you need a guide to Google Tag Manager, head over to our post on How to Set Up & Install Google Tag Manager.
How to Set Up Google Analytics in Google Tag Manager
Create a new Google Analytics Tag
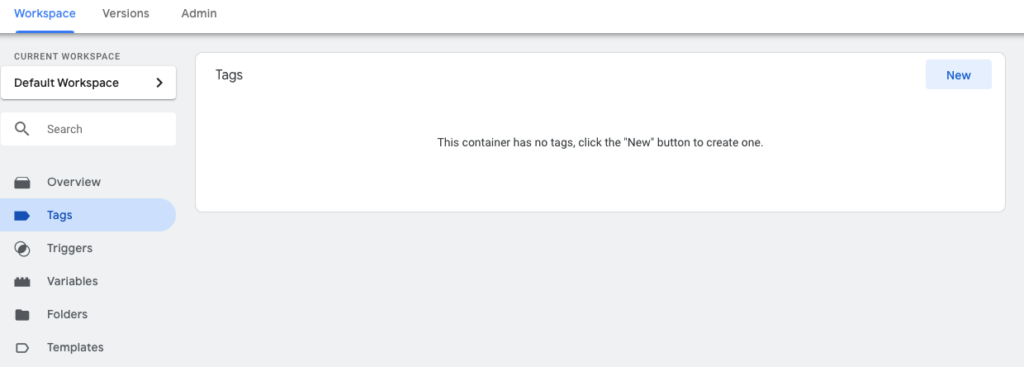
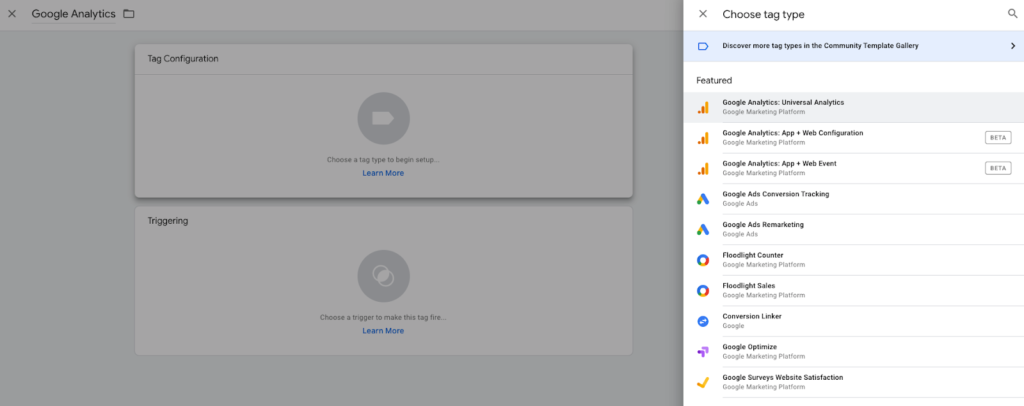
In your Google Tag Manager workspace, you’ll need to create a new tag. Do this by hitting the “New” button in the Tags tab. After creating the tag, you’ll want to name it “Google Analytics” or something similar so you know which tag it is at first glance. The type of tag we need to select is the Universal Analytics tag.
Next, make sure the Tag Type is Universal Analytics, and the Track Type is Page View. The next field is titled Google Analytics Settings, and will prompt you to Select Settings Variable.
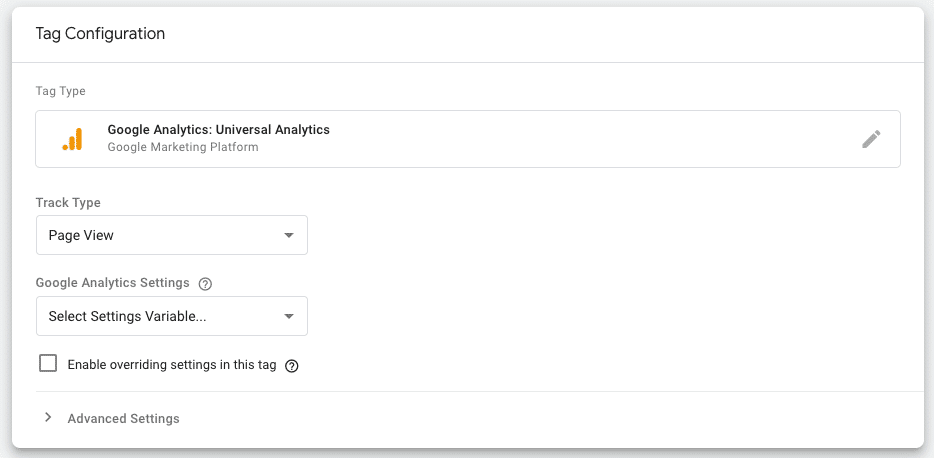
If you don’t have your Google Tag Manager and Google Analytics linked yet, you’ll need to create a new Google Analytics Settings Variable.
Create a new Google Analytics Settings Variable
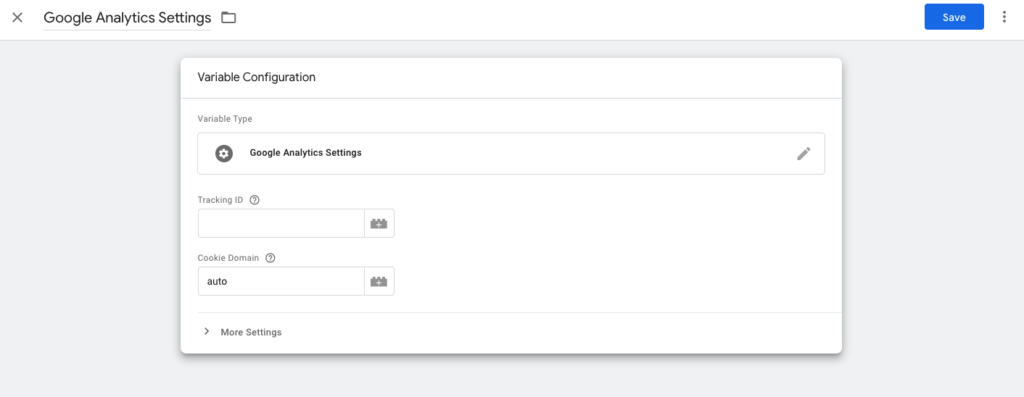
Click on Select Settings Variable and select New Variable from the drop down menu. In the new panel that slides open, you’ll need to add your Google Analytics Tracking ID. Make sure you save the New Variable you’ve created.
How To Find Tracking ID in Google Analytics
In Google Analytics, open up your admin settings panel using the gear icon in the bottom left corner.
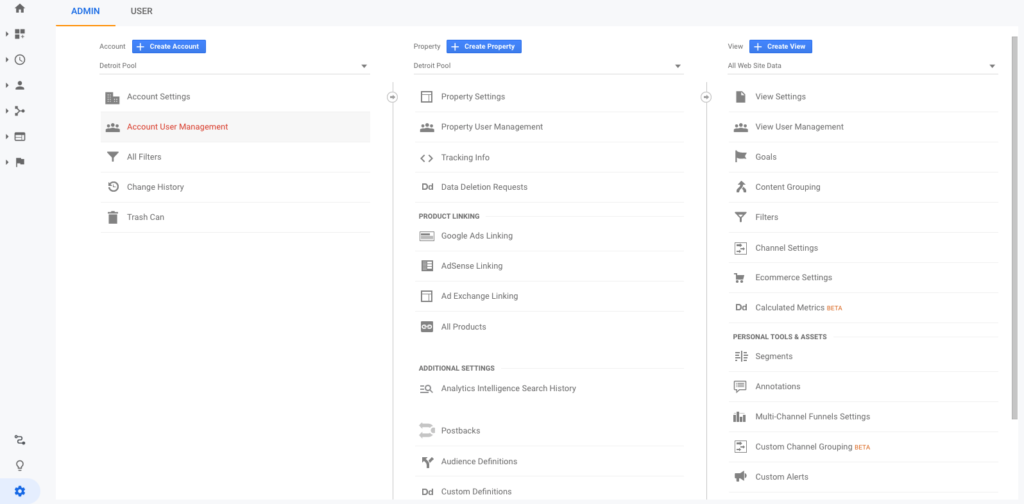
In the center column, open up Property Settings. Under Property Settings, you should see your Google Tracking ID number prominently displayed. We don’t need to copy the entire Google Analytics tracking code snippet, just the Tracking ID, as shown here.
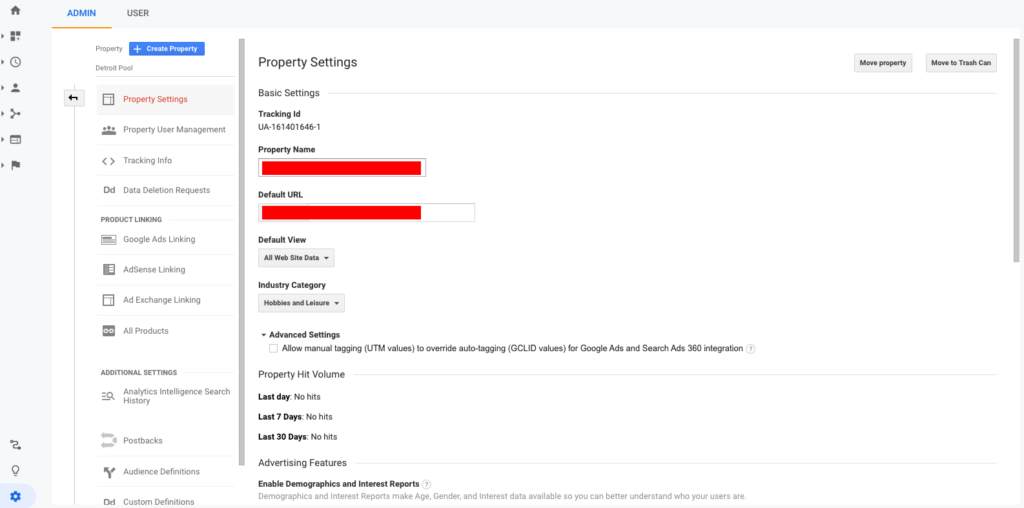
Copy the Tracking ID and enter into the Variable where it calls for it.
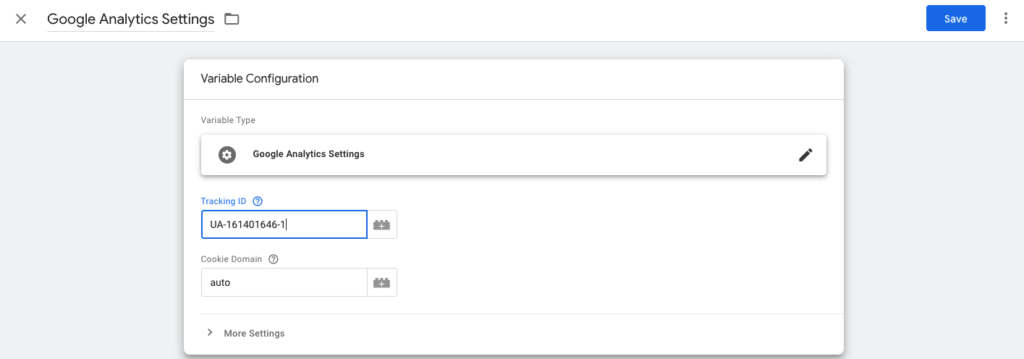
After naming and saving the variable, you should be taken back to the Tag setting. Now you need to add a trigger for all pages to track page views. Click under Triggering to choose a trigger to make this tag fire.
Create a new Google Analytics Trigger
Once you’re in the Choose a trigger window, you should see All Pages as an available trigger.
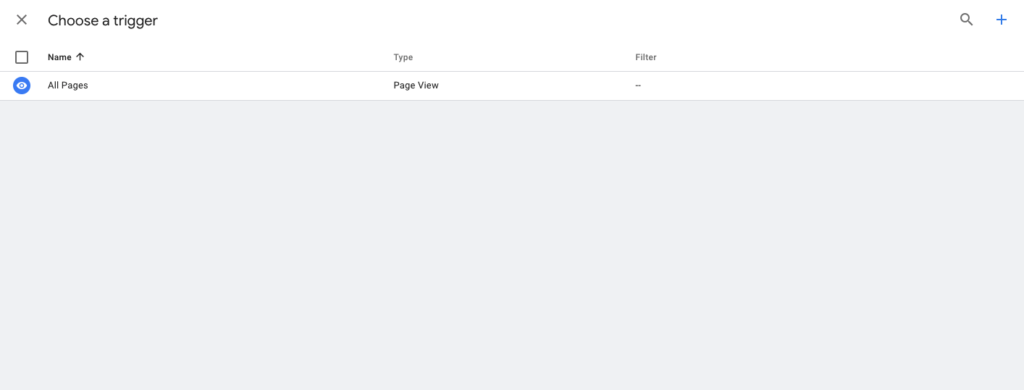
Choose All Pages as the trigger!
You should now see every element filled out in the Tag window – save it!
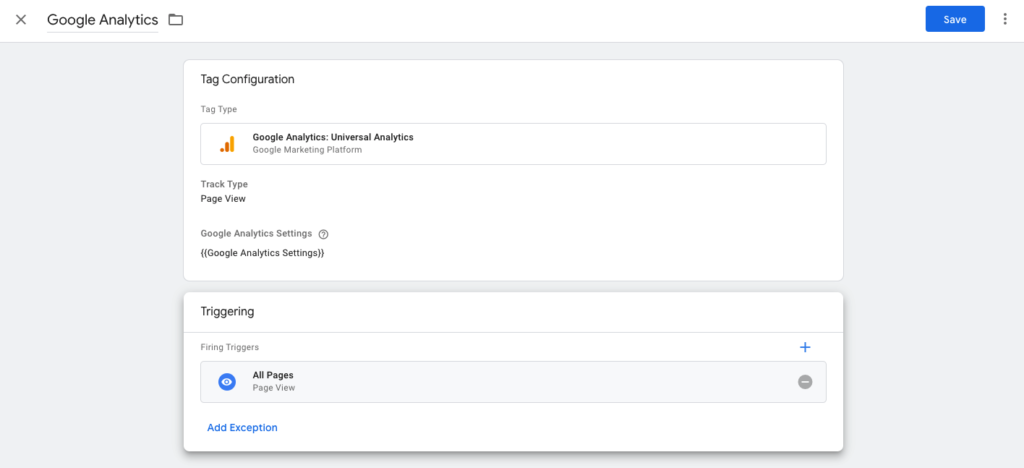
Finish implementing Google Analytics in your Google Tag Manager container by Submitting and Publishing it!
How to Check if Google Analytics is Working
Now let’s make sure that the Google Analytics tracking is working properly. The first step to this is to disable or delete any Google Analytics tracking code or plugin you had active on your site, if you had one before implementing Analytics in Google Tag Manager. If you have Google Analytics set up in both Tag Manager and also using the Google Analytics tracking code in the header of your site or in a plugin on your site, you will see inaccurate results, including inflated sessions, bounce rate, and possibly even false goals or conversions.
Enter preview mode in Google Tag Manager and make sure the container is showing up on your site. Once you’ve confirmed the new Google Analytics tag is showing up in preview mode on your site, exit preview mode. If you’re not sure how to do this, read up on it in our post on setting up Google Tag Manager.
Next, if you’re confident that the only Google Analytics code on your site is the code housed in Tag Manager, go to a private browser or a browser disconnected from your Google Account, and navigate to your site. In your Google Analytics window, navigate to Real Time – the clock icon – and make sure it’s showing at least 1 active user on your site. You can even bounce around on a few pages and make sure the active user behavior shows the same pages you have visited. If you have your own IP address traffic filtered out, try using a mobile device or VPN.
Look out for our next post on how to set up tracking in Tag Manager and goals in Analytics for common conversion actions on websites, including form submissions, clicks to call, clicks to email, and more. If you missed our post on how to set up a Google Tag Manager account and container, check it out!
While you’re here, check out our other free resources and start building your own momentum.
Share this article:
The Avalanche Email: Fun. Simple. Educational. No Selling.
Learn Result-focused SEO & Content
Join over 2,272+ others who get one email every Wednesday with simple instructions on how to get more website traffic and leads through SEO and content marketing. (Learn more about the email)
Keep Learning
Creating the Perfect SEO Content Template in Google Docs
Learn how to create an SEO Content Templates in Google Docs to help drive new traffic to your website from the search engines. SEO Content Templates provide specific recommendations and directives for creating new content on your website with the purpose of improving your SEO.
How To Show Up in Gemini (And Win More Local Jobs)
Show up in Gemini when homeowners search for landscaping services. Build the right signals on Google and your website to win more qualified local jobs.
How to Run Google Ads for Landscapers: A Complete Guide
Learn how to set up Google Ads for landscapers, attract qualified leads, and win more local jobs with this step-by-step guide.
🏔️ Watering > Planting New Seeds
Your next marketing win may already be on your site. Learn how to optimize existing pages for better rankings, traffic, and results.
The Recipe vs. The Meal
Your customers buy the experience, not the product. Discover a simple way to shift your message from ingredients to the full meal.
What’s the Best CMS for Landscaping Businesses?
Compare the best website platforms for landscapers. Learn the pros and cons of Wix, Squarespace, and WordPress, and why WordPress is best for long-term SEO.


